When doing projects on data handling (such as the Average Student) it is always awkward to collect data before using it with the class. Obviously we like to use data that is relevant to the class, as this will prove so much more engaging, but it is tedious to input all their data into a spreadsheet or similar. With Google Forms, you can create a form in 10 minutes with a question for each piece of data, and then send this to all the students in your class. They fill it in as a homework, and the data is automatically put into a spreadsheet for you.
Students need to be able to design good questionnaires, and this is one thing that is really useful in the real world of work too. But nobody does this using pen and paper any more. Get students to design a questionnaire to collect data about something to do with the school (travel, food, sport, etc), but have them use Google Forms to create a professional looking survey. This can then be emailed or put out in a school newsletter, so that they can get as many responses as possible. Surveys are no longer done on street corners!
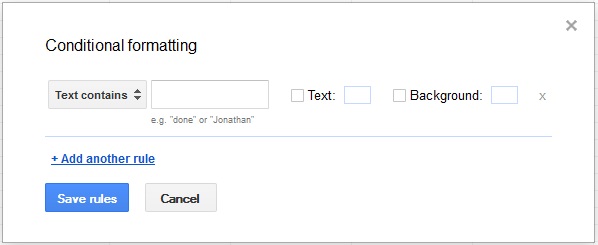
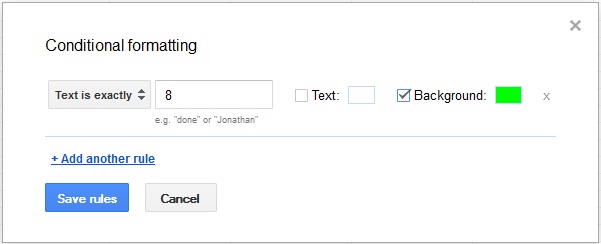
Create a form for a particular topic, where each student must self-evaluate their performance and confidence in each of the learning objectives through that topic. You just write each learning objective, and use a Scale or Grid (discussed below) for students to evaluate. The results are automatically collected, and you can then use Conditional Formatting (also discussed below) to highlight the different levels of confidence. This self assessment tool can be used with students of any age, from primary to Sixth Form. It is basically a high tech version of traffic lighting, but students love using computers.
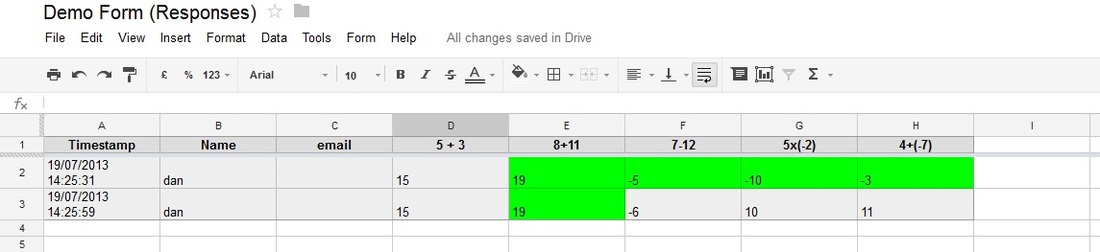
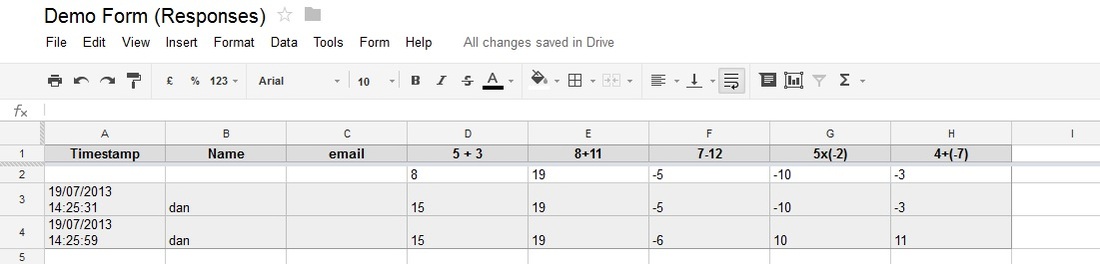
In a matter of minutes you can type (or copy) questions you would normally set as a worksheet homework as a Google Form. Insist students still do their working in the books (so you can check it if necessary), and write their final answers as their responses to the form. Their final answers are then imported automatically into a spreadsheet, and with a little Conditional Formatting you can mark them without actually having to do anything. Any that are wrong, you can then review their working, but saves you the time of checking all the working of those who got everything right!
Creating a short 10 question form for students each week to answer a variety of questions on the topics that have been covered so far will get them reviewing their learning throughout the year, and not just cramming for tests and exams. If you use the reply systems (detailed below) students will have a record of every time they try it, and best of all, they can repeat them as many times as they want, and you get constant feedback of how they are doing.
When you have a new class you can use a form to ascertain their prior knowledge, and their strengths and weaknesses. This can be based on questions and their answers, and also on scales and grids to reveal how they feel about the different topics. This will give you a sound starting point to get to know their view of the subject, and their confidence levels, before you start to plan accordingly.
If you have some form of Weekly or Monthly problem running in your school, then you can get students to upload their written solutions (either typed or scanned) to Google Drive, and then submit the shared URL via a Google Form. This also gets round the problem of not being able to write maths on the forms, which you can do in a Google Doc. This will give you easy access to important information, and to the URL, within the spreadsheet. You can then write comments in the spreadsheet about each as well, and comment on their original document in a different colour as necessary. You can also use a Choose from a List question for them to choose which problem they are uploading, so they can continue to work on them after the new problem is posted.
I love cryptography and code-breaking (see my other site Crypto Corner), and enjoy running a club on this. There are two national competitions each year, but I also like to run a school based one as well. Every two weeks I give them a clue in the session, and time to work on it. In the alternate weeks sessions, we look at some of the theory of codes and ciphers. For each round, students must type out their full solution, and (as above) upload and submit via Google Forms. In this case, points are awarded on a time to solve approach, so the fact that Google Forms automatically records the time they submit is crucial. I can then easily see who was first, how long they took, etc. Similarly this could be used for uploading solutions to other competitions where the time they submit is important.
You can easily create a form to select if you are awarding a merit or discipline in class, and then have this form open in the lesson to record things as they happen. You could have a text box to enter their name, a choose from a list to pick if it is praise or discipline, each of which takes you to a different page. Then on each page have a set of checkboxes for regular praiseworthy or offensive actions to quickly select from. This will then be recorded instantly in the spreadsheet. This could even be done department or school wide to keep track of things.
Google Forms are also great for keeping up to date with your form (if you have one). You can ask them what extra curricular activities they have been doing, which they are interested in starting, etc. You can also use it with a new form to collect some information about them early on, such as an interesting fact about them. All the information you collect is then stored in the spreadsheet for you to refer to when in parent's meetings or writing reports.
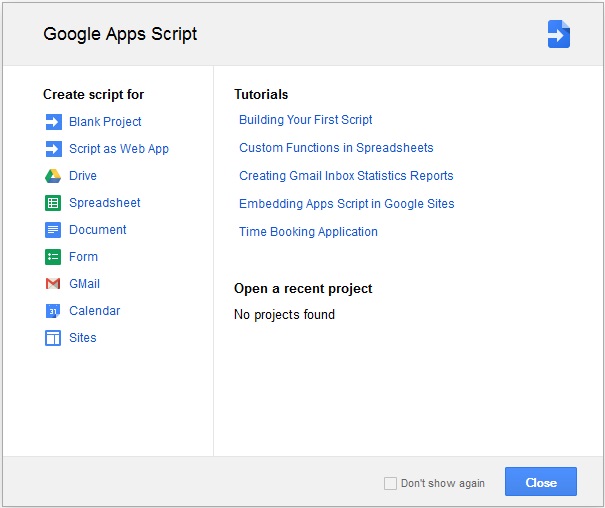
| Google Forms are one of the documents you can create within Google Docs. When in Drive, click on the red "CREATE" button and you will get something that looks similar to the image shown to the right. You can then select "Form", and a new window will open with the template, and a pop-up will appear asking you to name your form, and choose a theme. Now you are ready to start editing your form by inserting questions. Notice that when you hover over the title of the form, you can edit it, and you can also add a description of the form you are creating. This is used to give a general overview of what you are asking about in the form. | 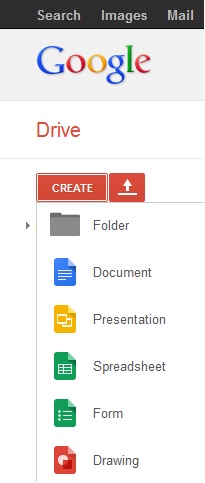 How to create a new form. |
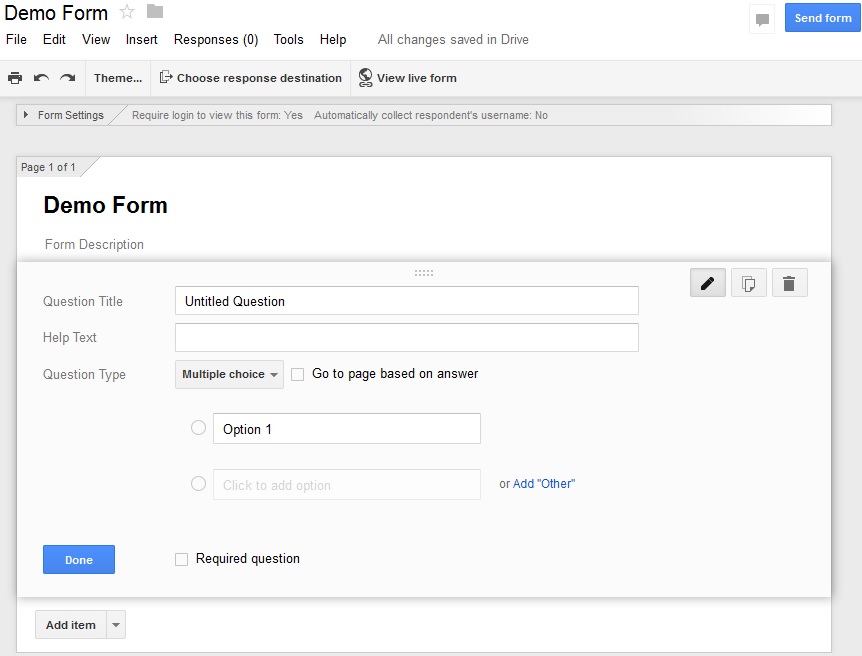
Below this is the first question box. For each question, you have several options:
Question Title - this is where you type the question you want to ask;
Help Text - here you can add any supporting information to go with the question. For example, give you answer to 1d.p., or any other helpful instructions;
Question Type - choose how you want the answer to be presented (we shall go through these below);
Required Question - if you select this box, then the respondent must answer this question to be able to submit the form;
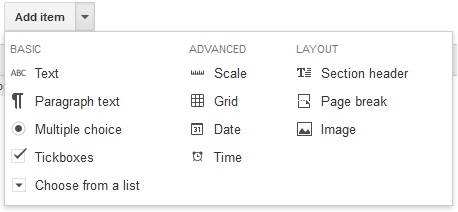
Add item - choose this to add a new question.
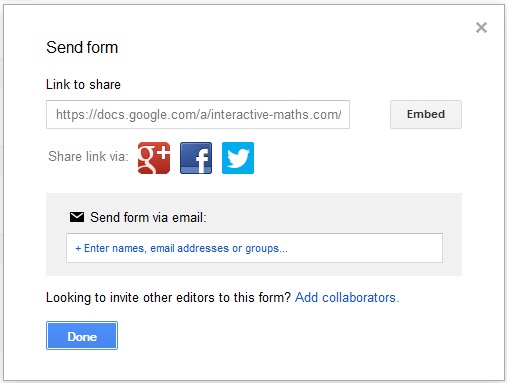 The Send form menu is where you select how you are going to share the completed form. | 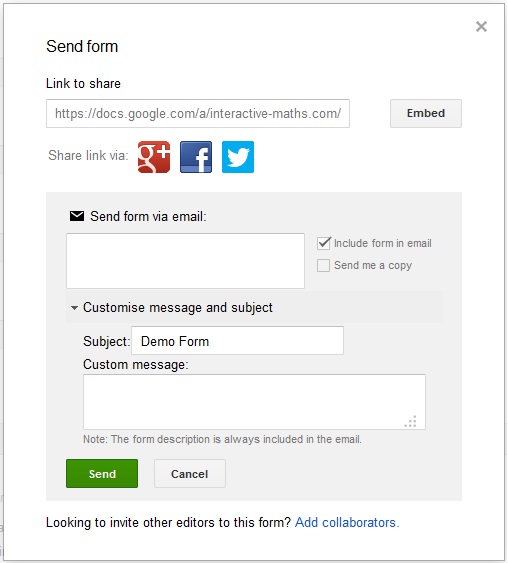 When you type emails, you get some more options. |
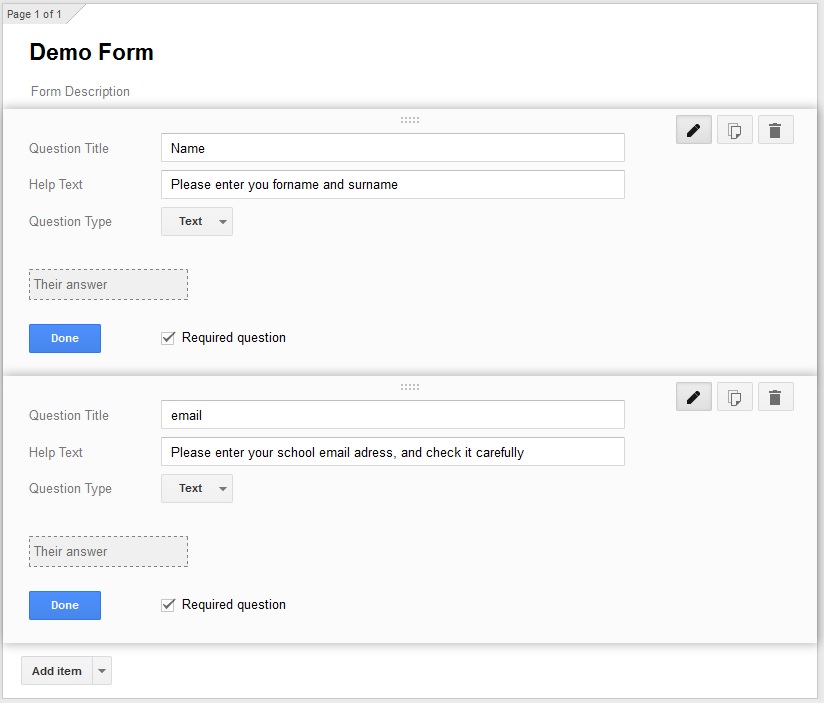
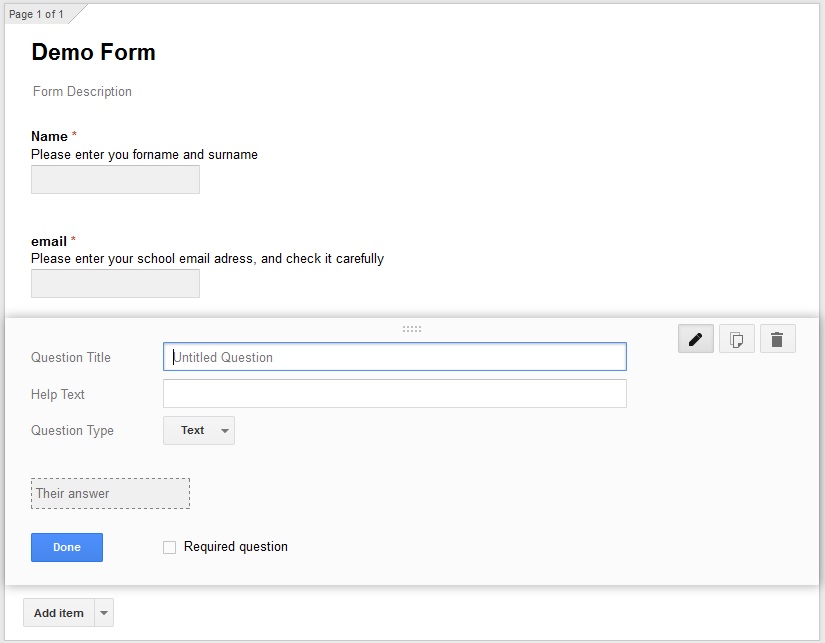
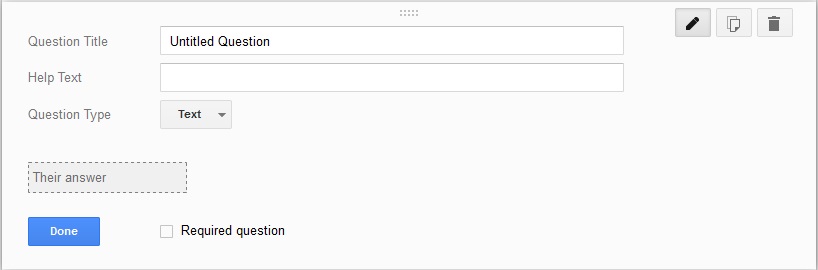
The simplest option is the text option, where the respondent simply enters a short answer by typing it. This can be used to provide a specific answer (a numerical answer for example) or to answer a question for which there are endless possibilities (i.e. for a name).

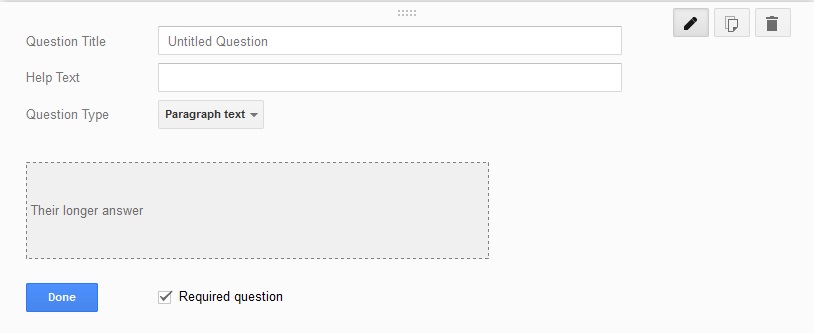
The step up from the Text option is the Paragraph Text question type, which allows respondents to give a fuller and longer response. This is great if they need to describe something, or write a short paragraph about something.

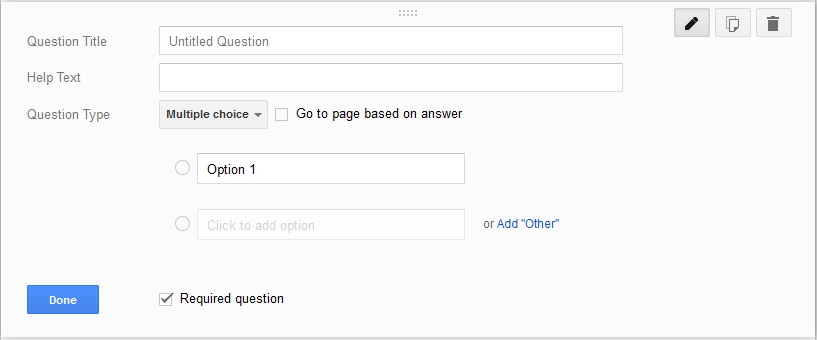
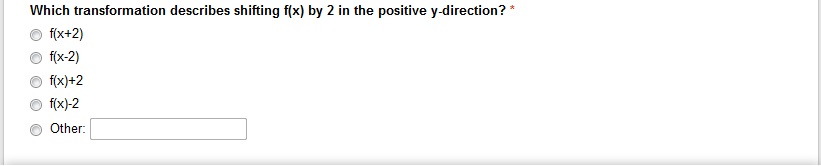
The Multiple Choice question type is another excellent option if you want to give your respondents a choice from which they must choose one option. You can also have an "Other" option, where respondents fill in their own answer like Text. It is also possible to make the form jump to different pages depending on their answer (we shall talk more about pages later).
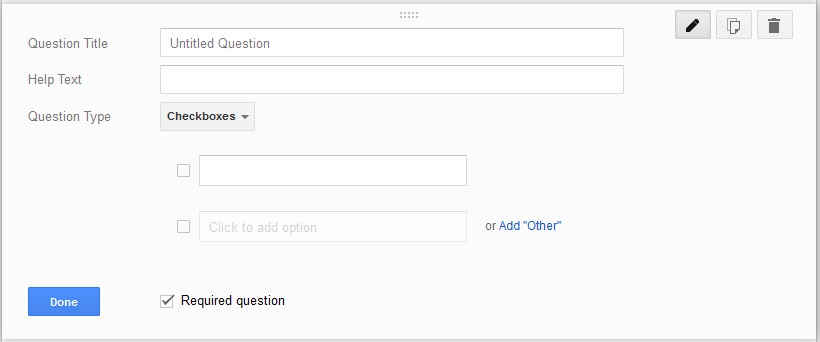
Checkboxes are similar to Multiple Choice questions, except the respondent can select as many of the possible answers as possible. It has the same option of having an "Other" box.

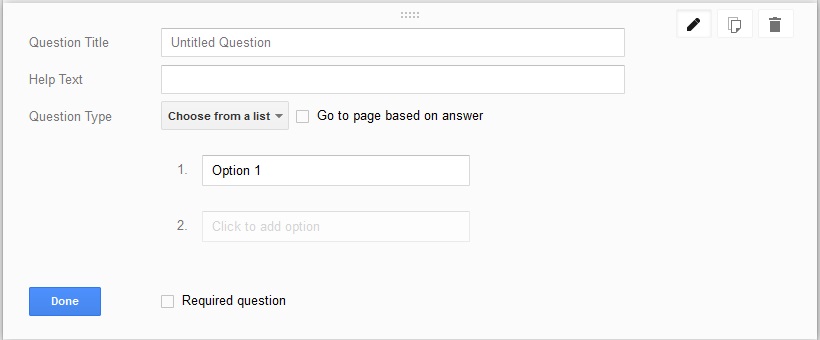
The same principle as Multiple Choice, but a different way of laying it out. Respondents still have to select one of the options, but they appear in a drop down menu instead of as individual selections. Again, there is the option to go to a new page depending on selected answer.

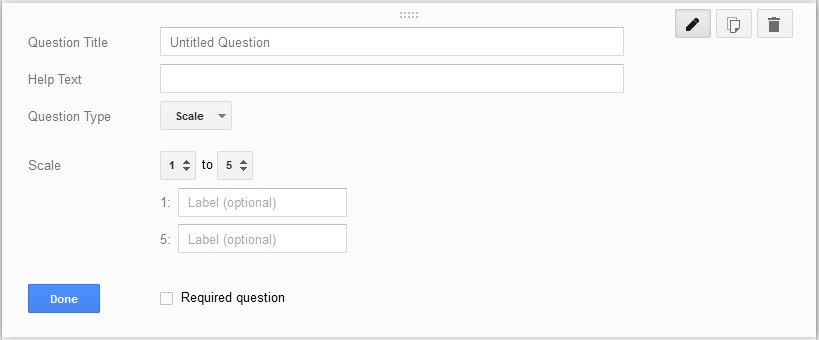
The scale option allows respondents to choose one option from a scale. This is often used to see how people feel about a particular topic. You can choose how much of a scale you want, whether to start at 1 or 0, and you can give the endpoints of the scales labels if you want.

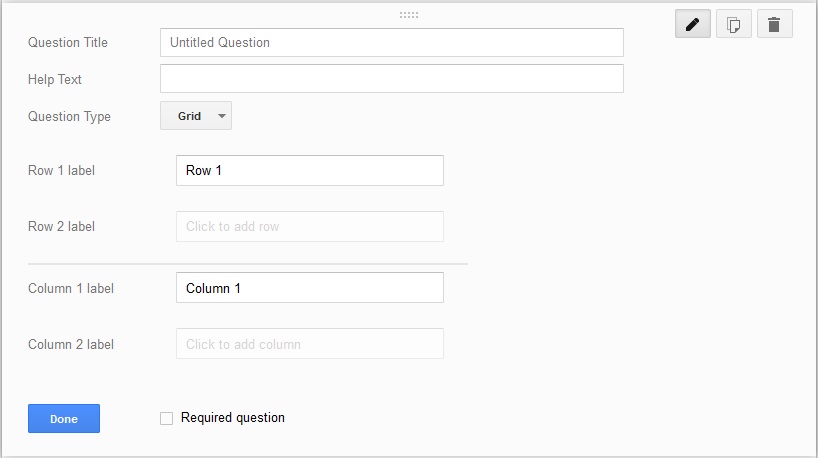
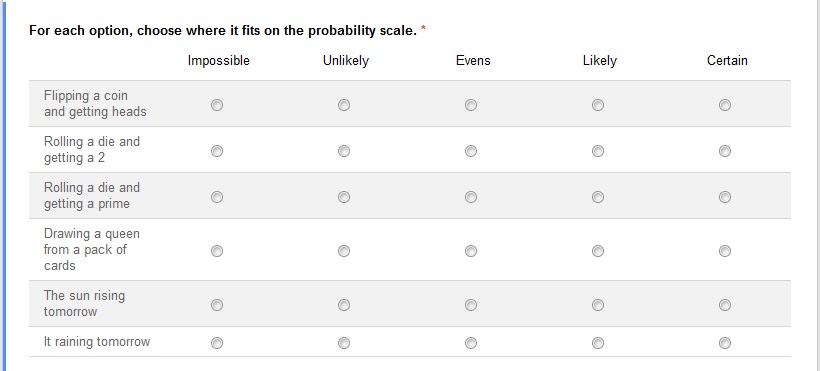
A grid is used when there are multiple questions which want to be ranked on the same scale. Traditionally used for "Agree/Disagree" statements, it is an excellent way to ask questions on Probability.
The final two options are to enter a date or a time. These could be good for collecting data about birthdays, or how long homework takes to complete.
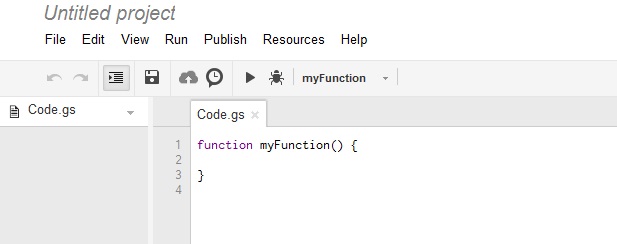
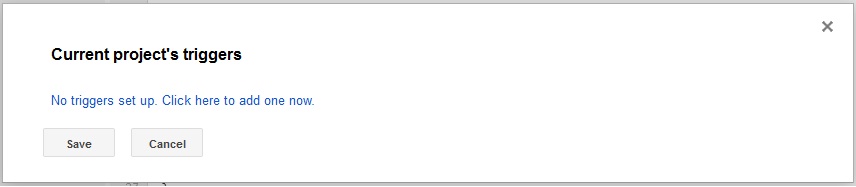
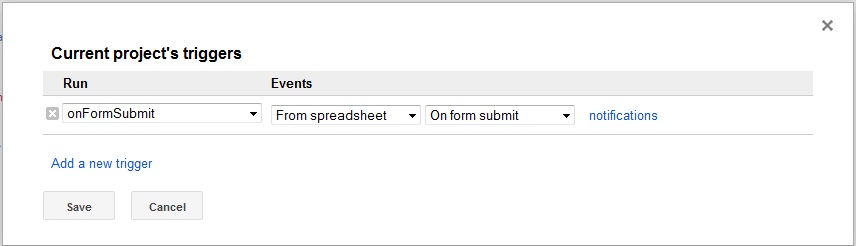
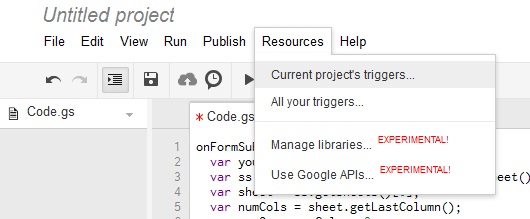 How to set triggers, which tell Google when to run the code | 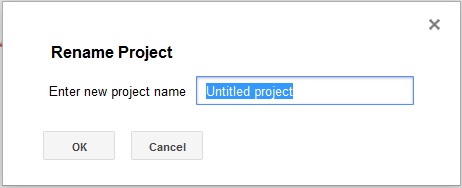 If you haven't named the code file yet, you will have to before setting triggers |
There are 4 different email responses, and finally a bit of code to make conditional formatting a bit less time consuming to set up:
Simple Reply Form
Reply Form with Simple Marking
Reply Form with Total Mark Given
Reply Form with Corrections Given
Code to Automatically Conditional Format the Spreadsheet
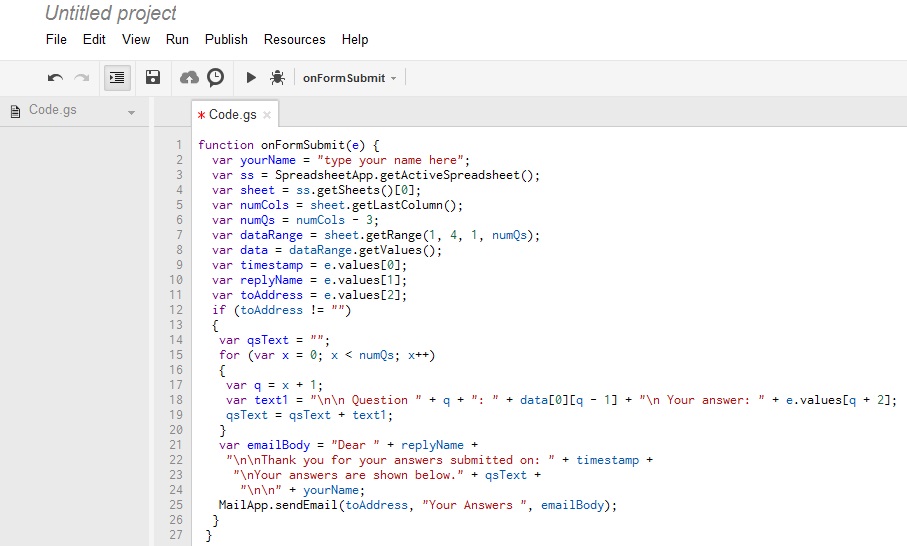
  function onFormSubmit(e) {
  var yourName = "type your name here";
  var ss = SpreadsheetApp.getActiveSpreadsheet();
  var sheet = ss.getSheetByName('Form Responses');
  var numCols = sheet.getLastColumn();
  var numQs = numCols - 3;
  var dataRange = sheet.getRange(1, 4, 1, numQs);
  var data = dataRange.getValues();
  var timestamp = e.values[0];
  var replyName = e.values[1];
  var toAddress = e.values[2];
  if (toAddress != "")
  {
   var qsText = "";
   for (var x = 0; x < numQs; x++)
   {
    var q = x + 1;
    var text1 = "\n\n Question " + q + ": " + data[0][q - 1] + "\n Your answer: " + e.values[q + 2];
    qsText = qsText + text1;
   }
   var emailBody = "Dear " + replyName +
    "\n\nThank you for your answers submitted on: " + timestamp +
     "\nYour answers are shown below." + qsText +
      "\n\n" + yourName;
   MailApp.sendEmail(toAddress, "Your Answers ", emailBody);
  }
} 
  function onFormSubmit(e) {
  var yourName = "type your name here";
  var ss = SpreadsheetApp.getActiveSpreadsheet();
  var sheet = ss.getSheetByName('Form Responses');
  var numCols = sheet.getLastColumn();
  var numQs = numCols - 3;
  var dataRange = sheet.getRange(1, 4, 1, numQs);
  var data = dataRange.getValues();
  var timestamp = e.values[0];
  var replyName = e.values[1];
  var toAddress = e.values[2];
  var qsText = "";
  for (var x = 0; x < numQs; x++)
  {
   var q = x + 1;
   var text2 = "";
   var yourAns = e.values[q + 2];
   var theAns = sheet.getRange(2,q + 3).getValue();
   if (yourAns.toLowerCase() == theAns.toLowerCase()) {text2 = "You are correct";}
   else if (theAns == "") {text2 = "";}
   else {text2 = "You need to try again";}
   var text1 = "\n\n Question " + q + ": " + data[0][q - 1] + "\n Your answer: " + e.values[q + 2] + "\n " + text2;
   qsText = qsText + text1;
  }
  var emailBody = "Dear " + replyName +
   "\n\nThank you for your answers submitted on: " + timestamp +
   "\nYour answers are shown below." + qsText +
   "\n\n" + yourName;
  MailApp.sendEmail(toAddress, "Your Answers ", emailBody);
} As with each of the codes that mark the solutions, you need to first insert the correct answers into the spreadsheet that records responses. To remind yourself of how to do this, see the instructions on Simple Marking.
  function onFormSubmit(e) {
  var yourName = "type your name here";
  var ss = SpreadsheetApp.getActiveSpreadsheet();
  var sheet = ss.getSheetByName('Form Responses');
  var numCols = sheet.getLastColumn();
  var numQs = numCols - 3;
  var dataRange = sheet.getRange(1, 4, 1, numQs);
  var data = dataRange.getValues();
  var timestamp = e.values[0];
  var replyName = e.values[1];
  var toAddress = e.values[2];
  var qsText = "";
  var count = 0;
  var total = 0;
  for (var x = 0; x < numQs; x++)
  {
   var q = x + 1;
   var yourAns = e.values[q + 2];
   var theAns = sheet.getRange(2,q + 3).getValue();
   if (yourAns.toLowerCase() == theAns.toLowerCase())
   {
    count = count + 1;
    total = total + 1;
    var text1 = "\n\n Question " + q + ": " + data[0][q - 1] + "\n Your answer: " + e.values[q + 2];
   }
   else if (theAns == "")
   {
    var text1 = "\n\n Question " + q + ": " + data[0][q - 1] + "\n Your answer: " + e.values[q + 2] + "\n This question is not included in your total mark.";
   }
   else
   {
    total = total + 1;
    var text1 = "\n\n Question " + q + ": " + data[0][q - 1] + "\n Your answer: " + e.values[q + 2];
   }
   qsText = qsText + text1;
  }
  var emailBody = "Dear " + replyName +
   "\n\nThank you for your answers submitted on: " + timestamp +
   "\nYour answers are shown below." + qsText +
   "\n\nYour total score is: " + count + "/" + total +
   "\n\n" + yourName;
  MailApp.sendEmail(toAddress, "Your Answers ", emailBody);
} As with each of the codes that mark the solutions, you need to first insert the correct answers into the spreadsheet that records responses. To remind yourself of how to do this, see the instructions on Simple Marking.
  function onFormSubmit(e) {
  var yourName = "type your name here";
  var ss = SpreadsheetApp.getActiveSpreadsheet();
  var sheet = ss.getSheetByName('Form Responses');
  var numCols = sheet.getLastColumn();
  var numQs = numCols - 3;
  var dataRange = sheet.getRange(1, 4, 1, numQs);
  var data = dataRange.getValues();
  var timestamp = e.values[0];
  var replyName = e.values[1];
  var toAddress = e.values[2];
  var qsText = "";
  for (var x = 0; x < numQs; x++)
  {
   var q = x + 1;
   var text2 = "";
   var yourAns = e.values[q + 2];
   var theAns = sheet.getRange(2,q + 3).getValue();
   if (yourAns.toLowerCase() == theAns.toLowerCase()) {text2 = "You are correct";}
   else if (theAns == "") {text2 = "";}
   else {text2 = "The correct answer is " + theAns;}
   var text1 = "\n\n Question " + q + ": " + data[0][q - 1] + "\n Your answer: " + e.values[q + 2] + "\n " + text2;
   qsText = qsText + text1;
  }
  var emailBody = "Dear " + replyName +
   "\n\nThank you for your answers submitted on: " + timestamp +
   "\nYour answers are shown below." + qsText +
   "\n\n" + yourName;
  MailApp.sendEmail(toAddress, "Your Answers ", emailBody);
} This last piece of code is slightly different to the other ones we have seen above. This one does not generate an email to be sent, but rather acts completely within the spreadsheet itself. It is a different way to apply conditional formatting to the spreadsheet (you can still use the other method).
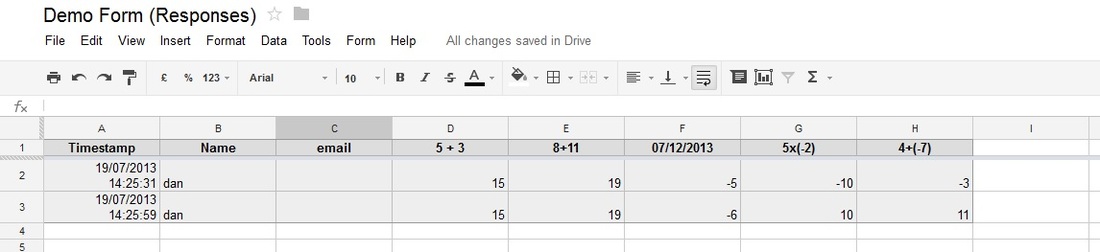
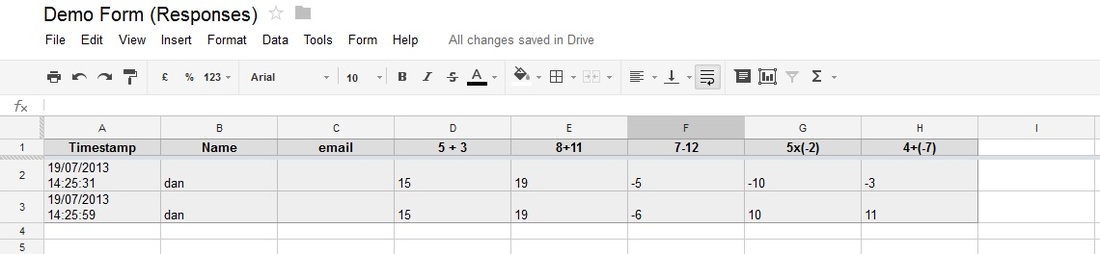
The difference with this system is that it uses the answers you type into the second row of the spreadsheet (for a reminder how to do this see the Simple Marking code). This is then easy to change in that row if needed. Also, this code allows for using upper or lower case letters, where the other way must match exactly.
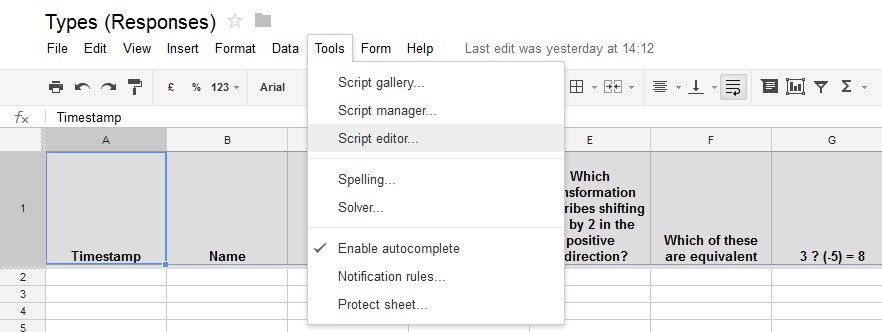
If you haven't already used another piece of code, then you follow the same method above to get to the Script Editor. If, however, you have already input one code, we need to open a new Project. To do this click Tools->Script manager... and in the pop up box that appears click "New". Give your new project a name ("format") by clicking the title.
  function onEdit() {
  var ss = SpreadsheetApp.getActiveSpreadsheet();
  var s = ss.getSheetByName('Form Responses');
  var numRows = s.getLastRow();
  var numAns = numRows - 2;
  var numCols = s.getLastColumn();
  var numQs = numCols - 3;
  var values1 = Array();
  var value2 = Array();
  for (var i = 0; i < numQs; i++)
  {
   values1[i] = Array();
   for (var j = 0; j < numAns; j++)
   {
   values1[i][j] = s.getRange(j + 3,i + 4).getValue();
   value2[i] = s.getRange(2,i + 4).getValue();
    if (values1[i][j].toLowerCase() == value2[i].toLowerCase() && value2[i] != "") s.getRange(j + 3,i + 4).setBackground("green");
    else s.getRange(j + 3,i + 4).setBackground("white");
   }
  }
}  RSS Feed