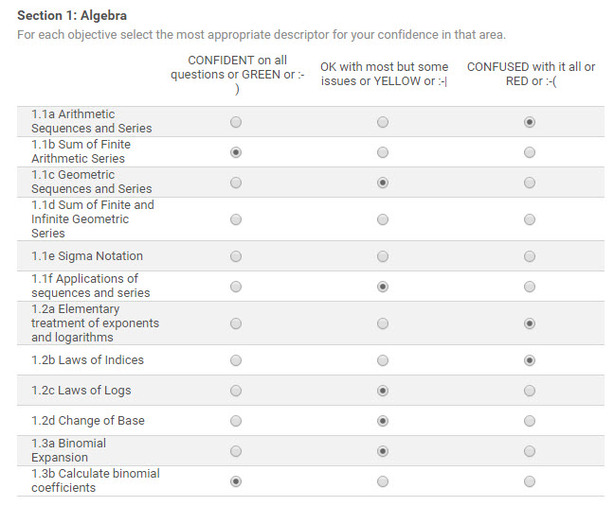
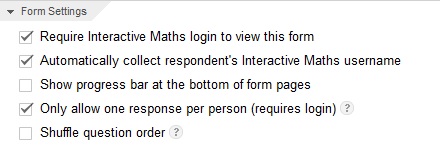
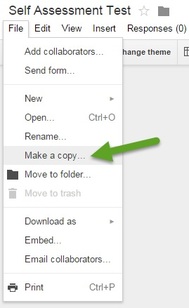
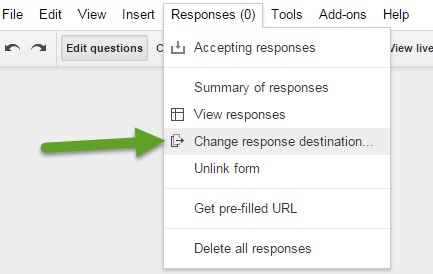
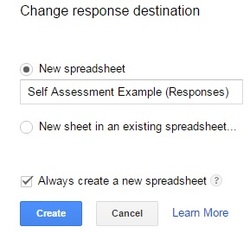
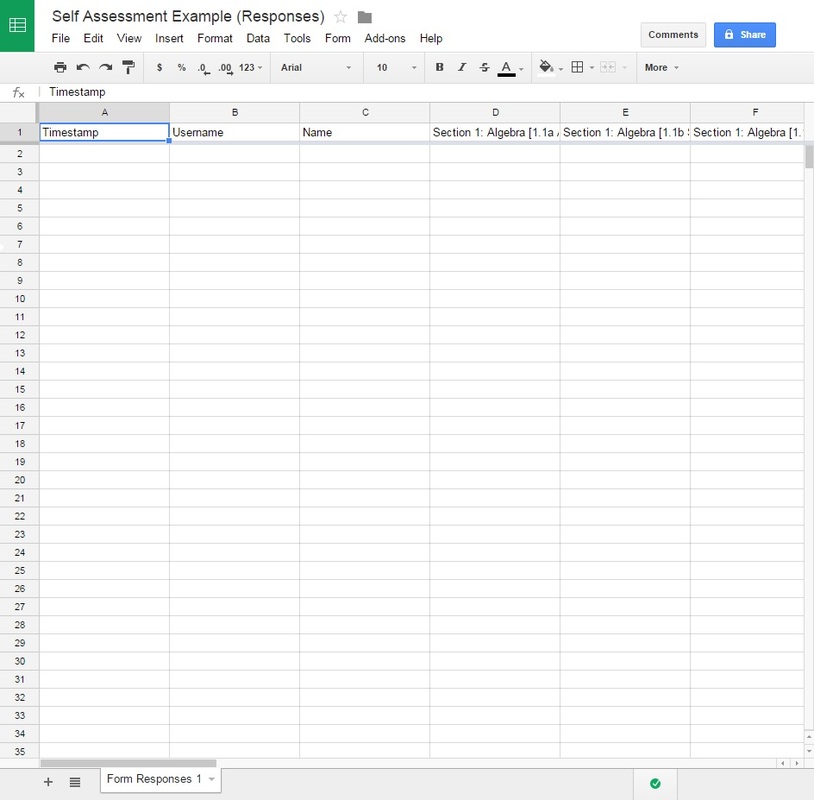
| First of all open this Google Form which has the requied layout for the form. Go to File->Make a copy... (as shown in Image 2). Choose a name for the new copy which will be saved in YOUR Google Drive. The Form Settings should be as seen in Image 3. Should you have a personal (not institutional) account, then the top two options will not appear. For the form to still work, you need to add an extra question at the very beginning of the form collecting the email address of the respondent (make it required). |
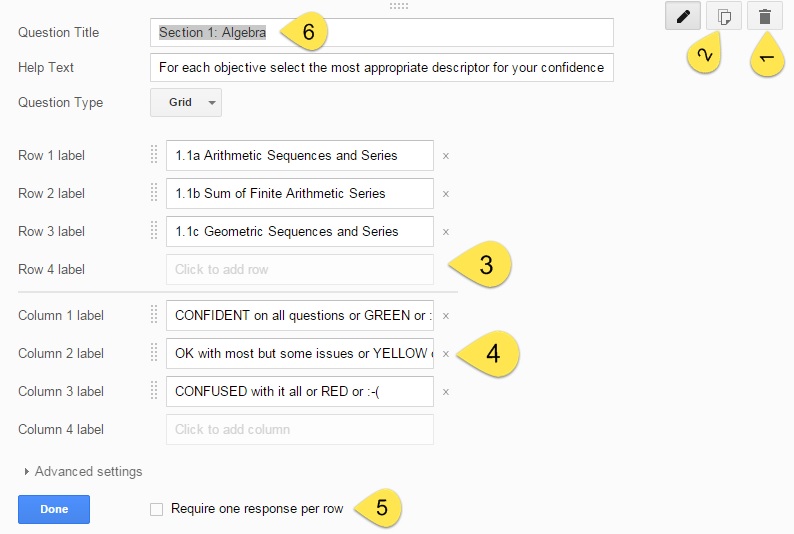
- If you have enough sections for your use already, then click this button to delete the current question;
- If you need more sections than are provided, then click this button to copy the current question;
- In this section you can edit and add extra parts to this section. This is where you add the individual objectives for each given section;
- This is the possible answers for students to select. DO NOT CHANGE THIS SECTION AT ALL. The script used later will only work if this remains as it is.
- You can decide if you want to force students to assess every objective, or allow them to assess some later on.
- Name the section that these objectives fit within.
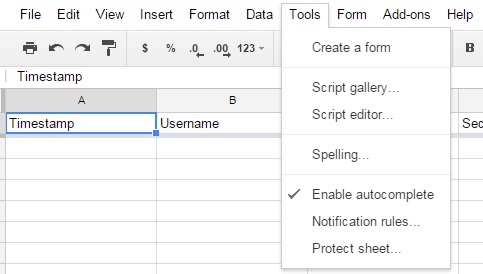
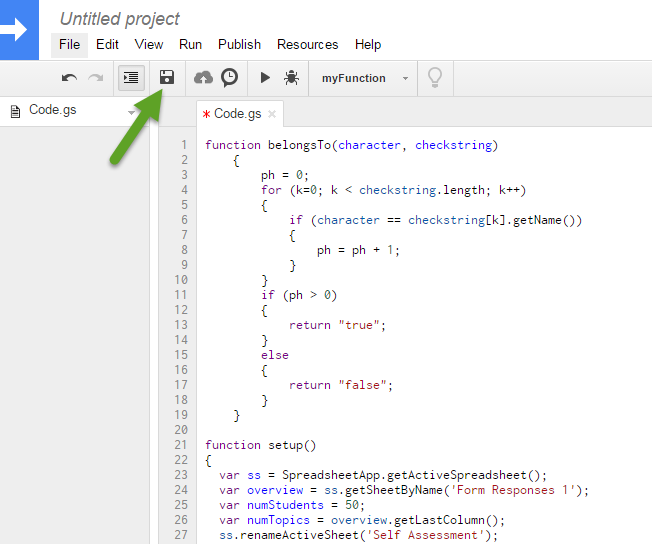
| Now you need to go to Tools->Script editor... (Image 8) A new window should open with the script editor (a pop up may appear offering templates, simply click Close on this). Now select all the code in this window and delete it. Open up the code file, copy the code and paste it into this window (it should look like Image 9). |
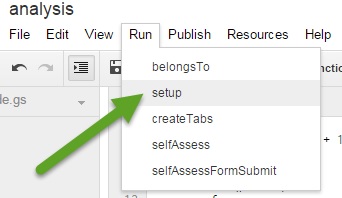
| Now go to Run->setup (as in Image 10). A pop up warning will appear saying "Authorization required". Click Continue, and then Accept on the next pop up that appears. This allows the code to edit the spreadsheet automatically, and send the automatic emails. |
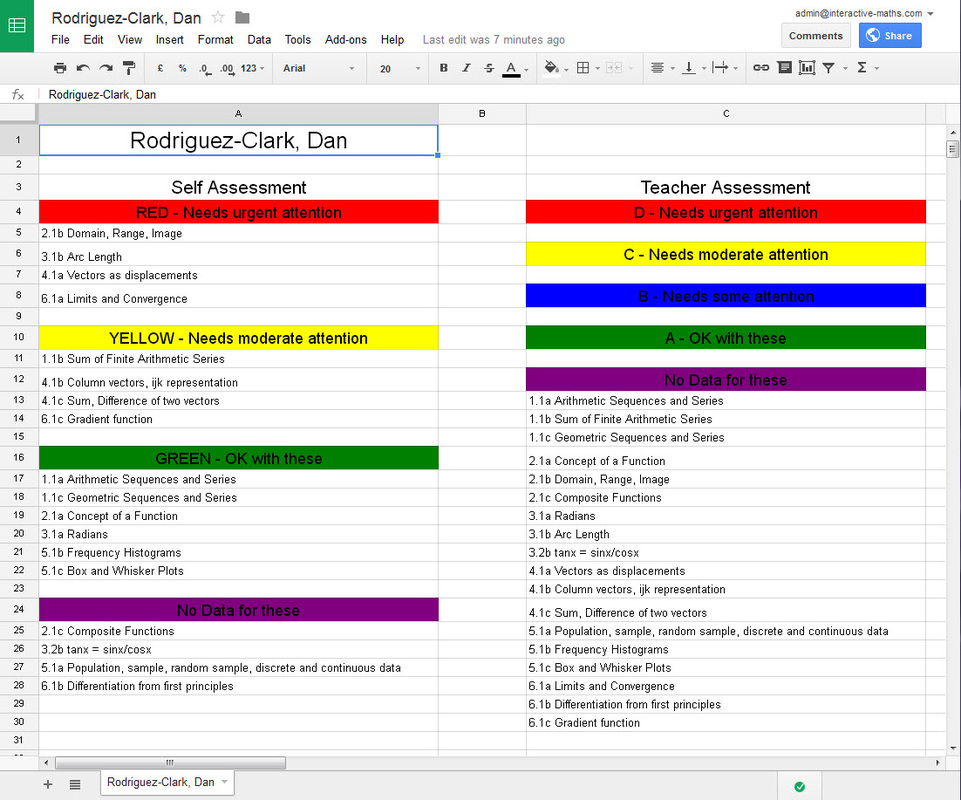
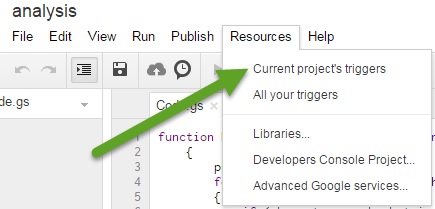
| Now we need to set it up to automatically email students after they have submitted their self assessment. Go to Resources->Current project's triggers (as in Image 12). In the pop up that appears, click the link "No triggers set up. Click here to add one now." |
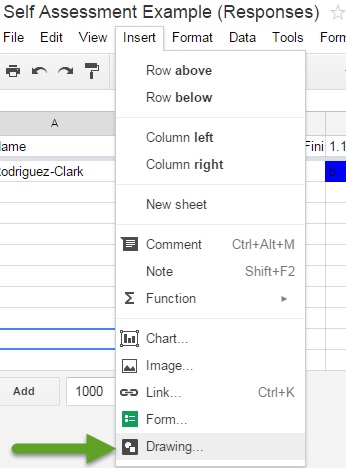
| 3. You can add a button to run the selfAssess code manually so you do not have to access the script editor each time you want to do this. Go to Insert->Drawing... (Image 15) making sure you are on the sheet where you want the button (your choice, but you will normally run it from Teacher Assessment). A fairly intuitive pop up opens where you can design a button (mine is shown in Image 16 below). Click Save & Close to insert this into the sheet. |
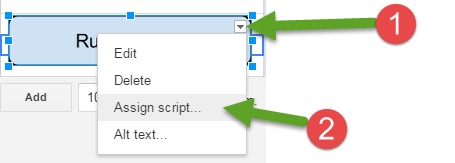
| Click on the button and drag it to where you want it. Then click on the little drop down arrow (1 in Image 17), and select Assign script... (2 in Image 17). In the pop up, type selfAssess, and press OK. Now when you press the button it will run the analysis. |


 RSS Feed
